A puddle under your refrigerator isn’t just annoying—it can damage floors, invite mold, and hint at a preventable failure. The good news: most leaks come from a handful of common issues you can diagnose (and often fix) in under an hour. This guide walks you through the top causes, how to pinpoint them, and clear, step-by-step repairs. Where a fix requires shutting off water or removing panels, we’ll flag safety steps first.
Quick Symptom Map
- Water on the kitchen floor, front of fridge: Leveling, drain pan, defrost drain clog.
- Water inside fridge, under crisper drawers: Clogged defrost drain.
- Water behind fridge near the wall: Water line, filter head/housing, inlet valve, icemaker tubing.
- Water from the dispenser area: Loose or cracked dispenser tubing; dripping from air in line.
- Excess condensation on shelves/door: Warm air leaks (gasket), door left ajar, high humidity settings.
Safety First
- Unplug the refrigerator before removing interior panels or working near fans or heaters.
- Shut off the water supply (usually a saddle or angle valve under the sink or behind the fridge) before touching any water line, filter, or inlet valve.
- Protect floors with towels or a tray—melt and flush water can travel farther than you expect.
- If your unit is under manufacturer warranty, check the terms before DIY work.
Tools & Supplies You May Need
- Phillips and flat-head screwdrivers
- Nut driver set (¼” and 5/16″ are common)
- Small socket set or adjustable wrench
- Turkey baster or squeeze bottle
- Pipe cleaner, soft brush, or flexible drain-cleaning wire
- Warm water mixed with a little dish soap or 1:1 warm water + white vinegar
- Food-grade silicone grease (for O-rings)
- Replacement water filter, gasket, tubing, or drain pan if cracked
- Level (or a smartphone level app)
Cause 1: Refrigerator Not Level (Water Puddles at Front)

When the fridge tilts forward or perfectly flat, water from defrost cycles may not flow to the drain correctly and can run to the front.
How to fix
- Pull the unit forward carefully.
- Place a level on the top edge or inside shelf.
- Adjust front leveling feet so the fridge is slightly higher in front (about 3–6 mm).
- Recheck doors: they should close firmly without bouncing back.
Result: Condensation and defrost water head toward the drain rather than the door gasket and floor.
Cause 2: Clogged Defrost Drain (Water Under Crispers or Leaking Periodically)

Every frost-free fridge melts ice off the evaporator coil. That water should run through a small drain hole to a pan near the compressor where it evaporates. Crumbs, algae, or ice can block it and send water into the fresh-food compartment.
How to diagnose
- Lift the crisper drawers: see water pooling on the bottom?
- In the freezer, look for a sheet of ice on the floor or under the evaporator panel.
Step-by-step fix
- Unplug the fridge.
- Access the freezer rear panel (or the back of the fresh-food compartment on some models) to find the drain hole.
- Use a turkey baster to flush the drain with warm water until it flows freely into the rear pan.
- For stubborn clogs, gently use a pipe cleaner or flexible wire; do not force anything that could puncture the tube.
- Mix a cup of warm water + a splash of vinegar and flush again to discourage algae.
- Reinstall panels, plug back in, and monitor for 24–48 hours.
Cause 3: Frozen Drain (Typically After Door Left Ajar)

If humid air enters, the drain inlet can ice over.
How to fix
- Unplug.
- Remove the freezer rear panel (if required).
- Melt ice with warm (not boiling) water using a baster. Repeat until you see water flow to the pan.
- Check door seals and leveling so the problem doesn’t recur.
Cause 4: Cracked or Misplaced Drain Pan (Puddle Under the Unit)

A plastic drain pan sits atop or beside the compressor to evaporate defrost water. If it’s cracked or knocked out of place during cleaning or moving, water ends up on the floor.
How to fix
- With power off, pull the fridge forward.
- Locate the drain pan near the compressor.
- Inspect for cracks, warping, or overflowing.
- Reseat the pan properly. If cracked, replace with a model-specific part.
- Vacuum dust from condenser coils (improves evaporation).
Cause 5: Door Gasket Leaks (Condensation & Intermittent Drips)

A torn, hardened, or dirty door seal lets warm air in, creating heavy condensation that looks like a leak.
How to diagnose
- Close a thin strip of paper in the door and pull—if it slides out easily, the seal is weak in that spot.
- Look for visible gaps or mildew.
How to fix
- Clean gaskets with mild soap and warm water; dry thoroughly.
- Warm stiff seals gently with a hair dryer (low heat) to help them re-shape.
- If torn or permanently curled, replace the gasket (model-specific). Press into the retainer, working corners first.
Cause 6: Water Filter or Filter Head Leaks (Drips When Dispensing or Behind the Fridge)

A misaligned filter, old O-rings, or a cracked filter head can leak.
How to fix
- Shut off water to the fridge.
- Remove the filter; inspect O-rings. Replace the filter if worn or past due.
- Lightly coat O-rings with food-grade silicone grease.
- Reinstall fully until it clicks/locks.
- If the leak persists, inspect the filter housing/head for hairline cracks. Replace if damaged.
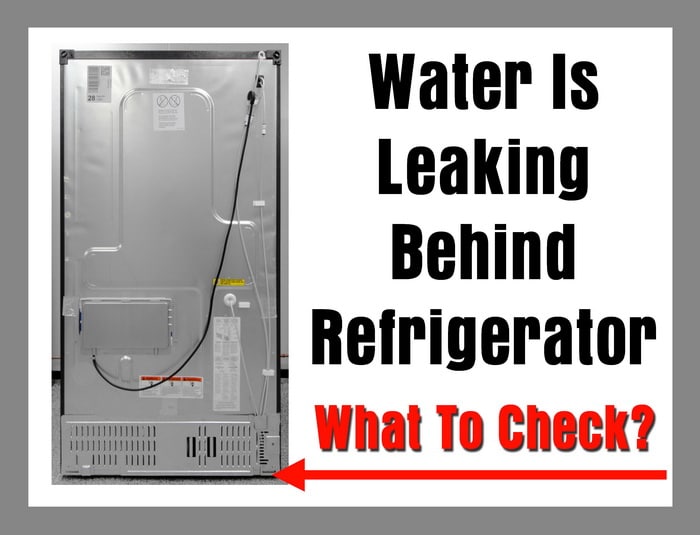
Cause 7: Icemaker Fill Tube or Water Line Issues (Leak at Back or Inside Freezer)
The small tube that feeds your icemaker can pop out, freeze, or crack. Likewise, the supply line (copper, braided, or plastic) can loosen or pinhole.
How to fix
- Turn off water supply.
- Inspect the rear water line, fittings, and icemaker fill tube.
- Tighten compression fittings gently; replace cracked tubing.
- If the fill tube is iced over, defrost with warm water and check for alignment back into the cup.
- Turn water on and check for drips.
Cause 8: Inlet Valve Leaking (Puddle Behind the Fridge Even When Not Dispensing)

The electric inlet valve opens to feed the filter/ice maker. Mineral buildup can prevent it from sealing fully.
How to fix
- Turn off water and unplug.
- Access the inlet valve (usually bottom-rear behind a cover).
- Inspect for mineral deposits or a slow drip at the outlet ports.
- Replace the valve if it leaks even when powered off—cleaning is rarely reliable long-term.
Cause 9: Dispenser or Interior Tubing Drip (Water at the Dispenser Tray)
Air in the line or a hairline crack can cause post-dispense dribble.
How to fix
- Run 2–3 liters of water through the dispenser to purge air.
- If dripping continues, remove the front dispenser panel (consult your model’s manual) and inspect tubing and couplers.
- Replace any tubing that’s cloudy, brittle, or cracked; re-seat quick-connect fittings fully.
Cause 10: High Humidity, Overstuffing, or Temperature Settings
Overpacked shelves block airflow; warm spots condense moisture that finds its way to seams.
Best practices
- Keep fridge at ~3–4 °C (37–39 °F) and freezer at −18 °C (0 °F).
- Leave space around vents for airflow.
- Use containers or towels to catch produce moisture in drawers.
- In very humid climates, enable the “humidity control/door heater” if your model provides it.
Step-By-Step Master Checklist (In Order)
- Level the fridge slightly higher in front.
- Inspect drain pan for cracks/overflow; clean condenser coils.
- Clear the defrost drain (flush warm water + vinegar; remove ice).
- Clean and test door gaskets; replace if failing the paper test.
- Purge dispenser line; check for drips and cracked tubing.
- Replace the water filter; inspect/grease O-rings; check filter head.
- Check rear water line and inlet valve for seepage; replace suspect parts.
- Verify temperatures and storage practices.
Work through these in sequence; most leaks are solved by steps 1–3 alone.
When to Call a Professional
- The inlet valve or filter housing is cracked and you’re not comfortable replacing parts.
- You see electrical damage, burnt connectors, or you suspect a sealed system (compressor/coils) issue.
- The leak continues after clearing the drain and leveling.
- There’s moldy odor or water damage under flooring that needs remediation.
If you’d rather skip the hassle—or the leak persists—contact us and we’ll fix it quickly and safely.