When a dryer refuses to power on, laundry day comes to a halt. The good news: many “dead” dryers are sidelined by simple issues you can check in minutes. This guide walks you through safe, methodical steps—from quick controls to deeper electrical checks—so you can decide what to fix yourself and when to call a pro.
The 5-minute quick checks
- Confirm it’s plugged in: Heavy dryer cords can pull loose. Reseat the plug firmly.
- Check the door: The dryer won’t run if the door switch isn’t engaged. Close it firmly; try pressing near the latch while hitting Start.
- Look for Control Lock/Child Lock: Icons vary (padlock, key). Disable it per the panel label—often holding a button combo for 3–5 seconds.
- Cancel Delay Start / Timed Start: If set, the dryer will wait. Clear any delayed cycle.
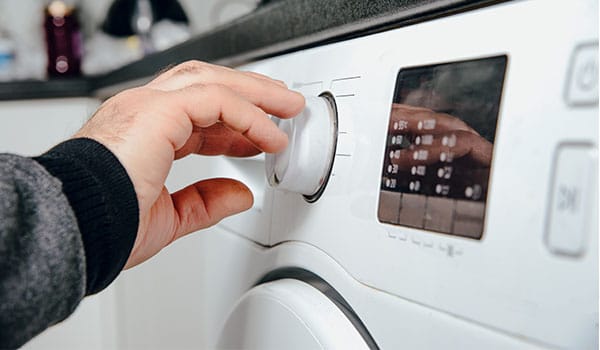
- Choose a valid cycle: Some “air fluff” or “wrinkle care” modes won’t begin without heat/time settings. Select a standard timed dry and press Start (sometimes you must hold for 2–3 seconds).
- Try a “power reset”: Unplug for 2–3 minutes (or switch the breaker off), then restore power. This can clear control board glitches.
Verify the power supply (most common culprit)
Dryers are power-hungry and rely on a clean, dedicated circuit.
1) Check the breaker
- Electric dryers (North America): Typically use a double-pole 240V breaker. If one side trips, you might have partial power (odd lights, no start).
- Fully switch the breaker OFF and then ON to reset—don’t just “tap” it.
- Gas dryers: Usually run on a standard 120V circuit. The breaker can trip just like any outlet circuit.
2) Don’t use power strips or extension cords
These can starve the dryer and cause nuisance trips. Plug directly into a proper outlet.
3) Test the outlet (simple methods)
- Plug in a lamp or small appliance to confirm the outlet works.
- If available, use a receptacle tester. Any flickering or intermittent power suggests a bad outlet or loose connection.
Warning: If you’re not experienced with electrical work, do not probe live outlets with a multimeter. Leave advanced testing to a professional.
Inspect the power cord and terminal block

With the dryer unplugged and rear access panel removed:
- Power cord: Look for cuts, scorch marks, or crushed insulation near the strain relief.
- Terminal block (where the cord attaches): Loose lugs or heat damage can stop power from reaching the machine. Tighten to manufacturer torque specs only if you’re comfortable; otherwise, call a pro.
- Cord type: Ensure the cord matches your installation (3-prong vs 4-prong) and is wired correctly to neutral/ground.
Controls and user settings that block starting
- End of cycle signal stuck? Some models won’t respond if an alert is being acknowledged—press Power then Start again.
- Door not aligned: If the strike plate is bent or the latch loose, the door switch won’t engage. A misaligned door can mimic no-power.
- Moisture sensor/Load size quirks: Tiny test loads may not trigger some auto cycles; use a timed cycle when diagnosing.
If the lights work but it still won’t start
This section applies when displays or drum lights operate, but the motor won’t run.
- Start switch: A faulty momentary switch can prevent the start command.
- Door switch: Even with a drum light, the switch may be dual-circuit (light vs run). Test continuity only with power disconnected.
- Belt switch (some models): If the drive belt breaks, a lever switch opens and the motor is disabled.
- Thermal fuse (safety fuse): Often mounted on the blower housing; if blown, the dryer won’t run. Blown fuses usually point to a clogged vent or overheating—fix the root cause before replacing.
- Drive motor or relay: A seized motor or failed control relay prevents start; you may hear a faint click or hum.
- Main control board: Rarely, a failed board keeps the unit “awake” but unwilling to start.
Pro tip: If you hear a hum when pressing Start but the drum doesn’t turn, try spinning the empty drum by hand (door closed, pressing Start). If it briefly catches and stops, suspect a failing motor or capacitor (if equipped).
How to check the door switch (safe, simple test)

- Unplug the dryer.
- Locate the switch behind the front panel near the latch area (often accessible by removing the top or front).
- With a multimeter on continuity, press and release the actuator—reading should change between open and closed.
- Replace if stuck, loose, or electrically open when pressed.
Understanding the thermal fuse (and why it blows)
The thermal fuse is a one-time safety device that opens if exhaust temperatures exceed safe limits—commonly due to a blocked vent, crushed flex duct, or lint buildup.
- A blown fuse usually yields no start (or immediate shut-off).
- Never bypass it. Replace the fuse and correct airflow problems: clean the lint screen, interior lint paths, blower wheel, and especially the full vent run to the outdoors.
Smart models: soft resets and error codes
- Try the manufacturer’s reset sequence (often unplug 2–3 minutes, press Power, then reselect a basic cycle).
- Check for stored codes on the panel; some brands show a letter-number pair indicating switch, fuse, or motor faults.
- If your dryer pairs with an app, run a diagnostic or test cycle for clearer fault direction.
Tools you might need
- #2 Phillips and flat screwdrivers
- Nut drivers (1/4″, 5/16″)
- Flashlight
- Multimeter with continuity setting (optional but helpful)
- Vacuum and brush for lint paths
- Work gloves and safety glasses
A quick decision tree
- Absolutely no lights? → Check breaker → outlet → cord/terminal block.
- Lights on but won’t start? → Door switch → Start switch → Belt switch → Thermal fuse → Motor/relay.
- Hums then stops? → Motor/capacitor or seized drum → Check for obstructions and motor health.
- Blown thermal fuse? → Replace fuse and restore airflow (clean venting).
Prevent the next no-power event
- Clean the lint screen every load.
- Deep-clean the vent and ducting at least yearly (more often for long runs or heavy use).
- Avoid overloading—it strains the motor and traps heat.
- Keep the dryer on its own dedicated circuit with the correct breaker size.
- Inspect the cord and outlet annually for heat damage or looseness.
When to call a professional
If you encounter scorched wiring, repeated breaker trips, a blown thermal fuse without an obvious airflow cause, or anything that requires live-voltage testing, it’s time to bring in help. And of course, if you’d rather skip the hassle. If you couldn’t fix it, contact us and we will fix it.